Steps to Setup OMNI Channel and Benefits
What is OMNI Channel?
In my previous post I have explained the steps
to set up live agent (Live Agent Setup), with this post I will explain Omni channel with queue
base routing.
Omni-Channel is a flexible, customizable
feature, and you can configure it declaratively—that is, without writing code.
Omni-Channel is a routing tool where you need to enable and configure the
required settings, once you are done with the configuration you need to add it
to console app (Sales / service), it will automatically route work items to
available Agents in real time. You have an option to configure routing rules to
assign cases, chat transcripts to support agents through Omni-Channel or
configure routing rules to assign leads to sales team. Omni-Channel currently
supports leads, cases, chats, SOS video calls, social posts, orders, Live
Message (Classic / Lightning) and custom objects with the goal to be getting
the right work to the right person who has the capacity to help.
Enable OMNI Channel:
To enable Omni channel you need to
navigate to settings, steps to enable OMNI.
Salesforce classic: Setup à App Setup à Customize à Omni-Channel à Omni-Channel settings


Lightning: Setup --> Feature Settings --> Service --> Omni-Channel à Omni-Channel Settings
Once you are done with enabling Omni –
Channel, let move forward and create service channels.
Service Channels: Follow below path to create service
channels.
Salesforce classic: Setup --> App Setup --> Customize --> Omni-Channel --> Service channels
Lightning: Setup --> Feature Settings --> Service --> Omni-Channel --> Service channels
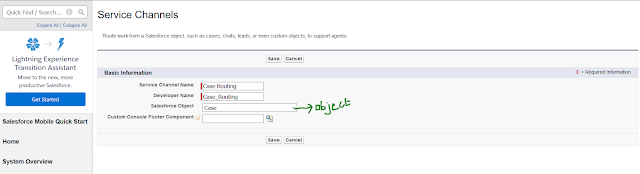

Here you can create a Service Channels for
few standard object like Leads, Cases, Chats and Custom objects.
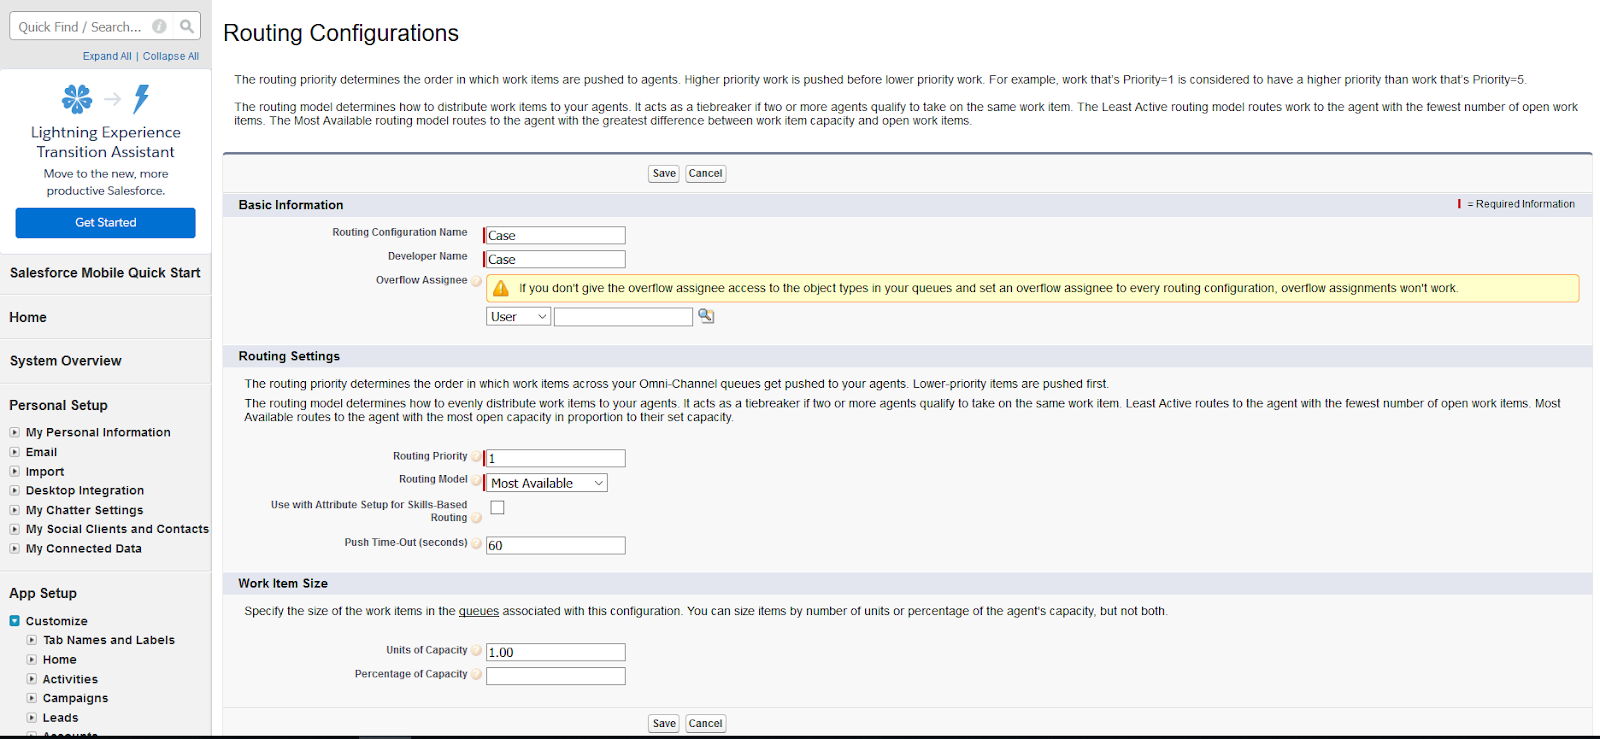
Create routing configurations: Follow below path to create routing
configurations.
Salesforce classic: Setup--> App Setup --> Customize --> Omni-Channel --> Routing configurations
Lightning: Setup --> Feature Settings --> Service --> Omni-Channel --> Routing configurations
Salesforce classic: Setup --> App Setup --> Customize --> Omni-Channel --> Presence Statuses
Lightning: Setup --> Feature Settings --> Service --> Omni-Channel --> Presence Statuses

Salesforce classic: Setup --> App Setup --> Customize --> Omni-Channel --> Presence Configuration
Lightning: Setup --> Feature Settings --> Service --> Omni-Channel --> Presence Configuration


Salesforce classic: Setup --> App Setup --> Customize --> Omni-Channel --> Presence Decline reason
Lightning: Setup --> Feature Settings --> Service --> Omni-Channel --> Presence Decline reason
>> Agents select a reason when they
decline a work item. Decline reasons help your supervisor to understand why you
decline the work.
Create Queue and assign it to Routing
Configuration:
>> Classic: setup --> from quick search --> search for ‘Queue’
>> Lightning: Setup --> From quick search --> search for ‘Queue’
>> Let’s consider if you are
creating a queue for Chat, select object as Chat Transcript (Formerly live Chat
Transcript) and add the routing configuration that you have created in previous
steps.
>> Add queue members (select a type
of member, then choose the group, role, or user from the "Available
Members" and move them to the "Selected Members.)


Change Routing Type on Chat Button: Follow below path to update the routing
type

>> Select Routing type in chat
button as ‘Omni-Channel Queue’
>> Select the queue which you have
created in previous step, to route chats to agents
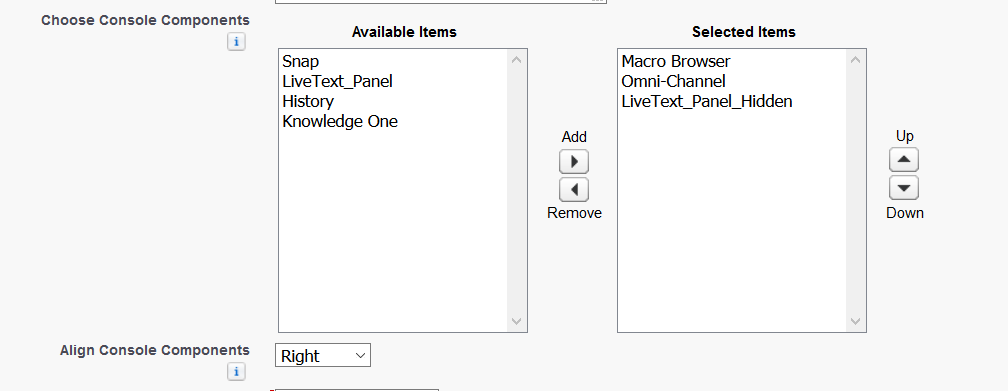
Add Omni Widget to your console App:
Classic: Setup --> App Setup --> Customize --> Apps --> Edit Select Console where you wanted to
add Omni Widget
>> From Choose console components, you can
move Omni-Channel from Available Items to Selected Items and then save
Lightning: Setup -->
Search for App Manager from Quick Search --> from List Edit the console app --> Go to Utility bar and add ‘Omni-Channel’


Grant Access to Presence Statuses:
>> Go to agent profile --> Service Presence Statuses Access --> Add relevant presence statuses to
‘Enabled Service Presence Statuses’ and click save.

>> Omni skill based routing and
Enable Secondary Routing Priority will be available in next post.
That’s all for now


0 Comments